

There are a lot of great tips and techniques out there to get amazing crackle, and in a future article we will explore them, but this post is a throwback to that simple crunchy Weber crackling that reminds me of Christmas. We chose a beautiful piece of Linley Valley Pork loin for this article.
Underpinning all the methods and guides to perfect crackle is one thing: dry skin.
Dry skin is the single most important step of preparation to achieving amazing crackling in the Weber, or any other cooker for that matter.
Skin towards the end of the process, starting to dry out.
The process starts off at a minimum 24 hours in advance, ideally up to 36 to provide even better results, so plan ahead.
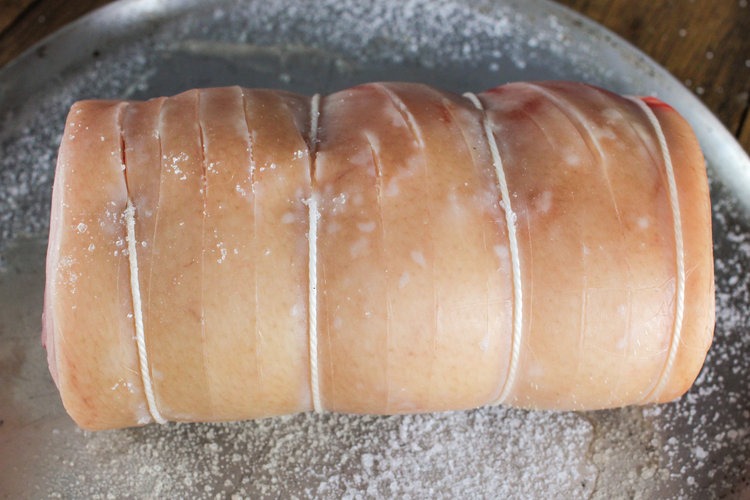
Vacuum sealed pork can leave you with your work cut out for you, especially the longer it has been bagged, however we used a vac seal pork loin for this method to show you that it is still very achievable to overcome.
For this guide I was closer to every twelve hours salting and patting down – sometimes life gets in the way of dinner.
By the time you are ready to cook the skin should feel dry to the touch.
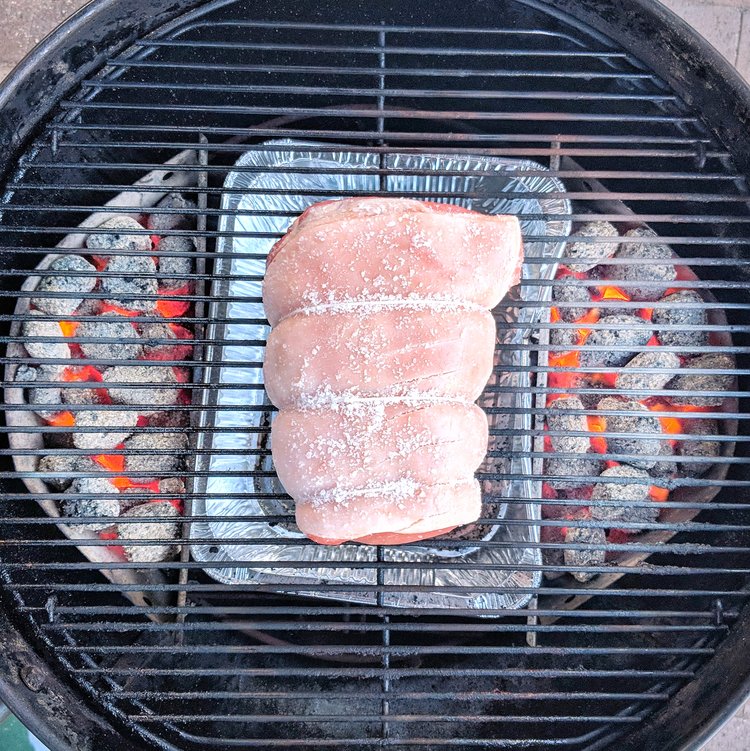
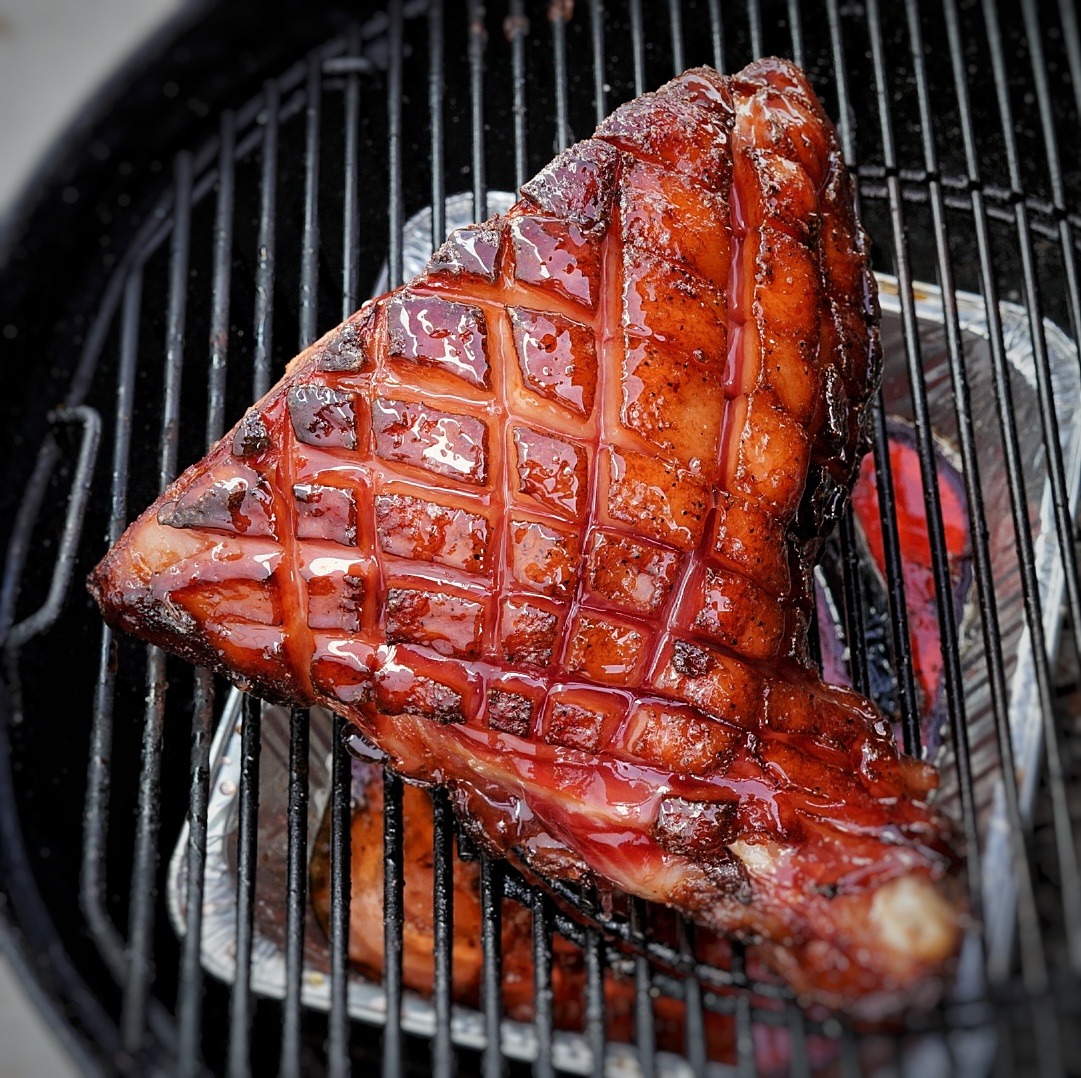
For this throwback guide I just had to go the classic roast set up – basket full of heatbeads on each side of the weber. Growing up this was the only way to even run these things – hot as hell, roasting mode or nothing.
If dry skin is the essential preparation technique, high heat is its cooking counterpart.
We need our Weber kettle, or chosen cooking device, to be super hot, I would estimate this set up to be around 230c, but we’re going old school so no thermometer gadgetry today.
Apply a little more salt if required to the skin – this last sprinkle is about seasoning; you may want to give a light sprinkle on the undercarriage also.
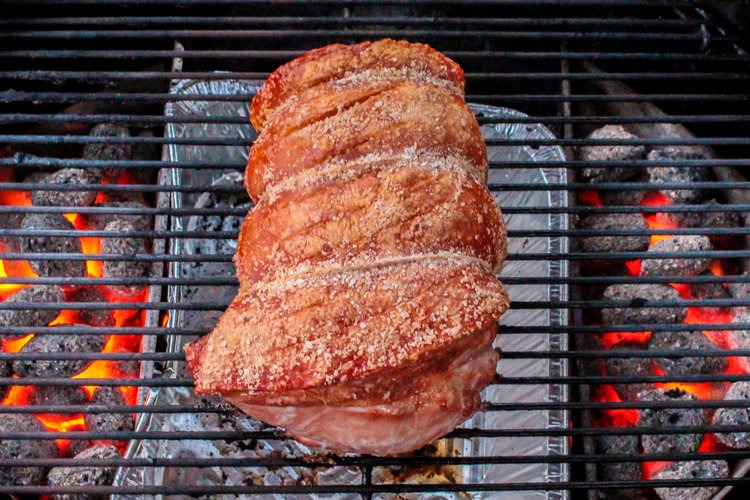
In terms of cook time, I use the crackle as the main guide for doneness. All up we were done around 1hr15min but your mileage will vary.
If you’re not sure if patches of skin are crunchy yet, tap them with the back of your knife – you’ll know when its ready both by feel and that hollow tapping sound that means only one thing: CRACKLE.
Note: if you apply this method to different pork cuts, particularly pork belly, you may need to employ techniques to avoid fat pooling on top of the skin and stopping crackle forming. The rolled nature of the loin allows fat to drip off during the cook.
While I was trying to keep it old school, I did use internal temperature to check the pork was cooked. Back in those good old days it seemed everyone like to err on the side of overdone because they didn’t want to accidentally give their guests botulism.
These days, I like my pork to be closer to a medium-well, which is around 65c (150f).
Bear in mind that roasting at such high heats your meat will continue to cook for a little longer after you take it off.
By the time I was happy with the crackle the meat internal was sitting at around 60c (145f) so I took it off and let it stand for 15-20 minutes before carving (good excuse for photos, right?). Do NOT rest it by covering it in foil or anything else that might undo all the hard crackle work we’ve done.
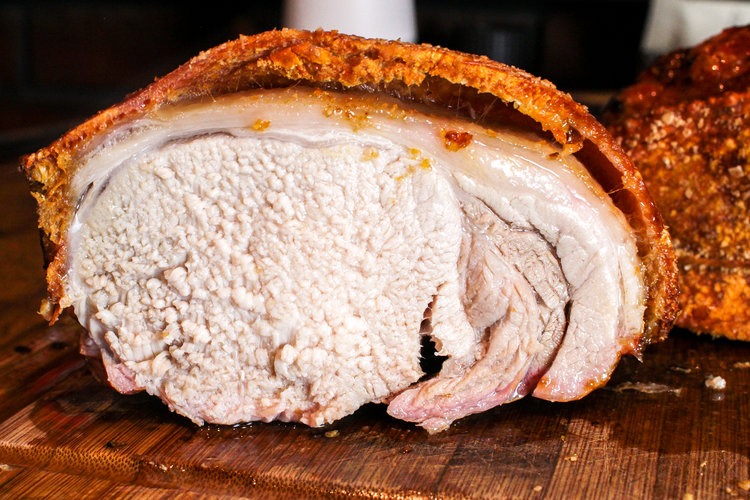
Nothing beats that sound of carving roast pork – a cacophony of crunch and crackle while a sea of juices floods the cutting board.
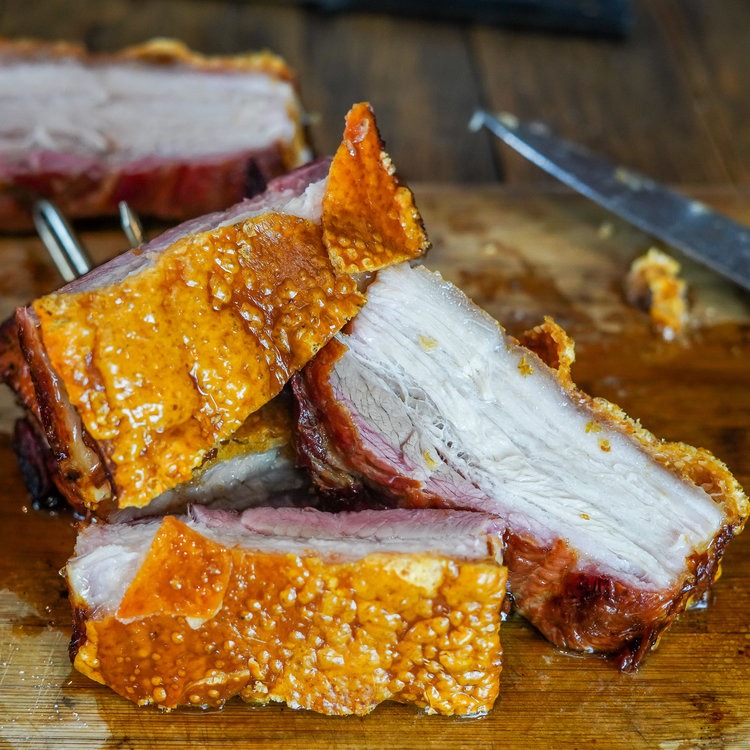
Looking above what we want to see is that separation of the skin from the meat, meaning the fat rendered away from the skin, assisting it to crackle further.
You can see the meat itself is cooked through but still moist – good quality pork means you don’t have to keep overcooking it like the dark ages!
In summary, remember the two key foundations to crackling: dry skin and high heat.
Next time we will explore a few tips and tricks – puffy, popcorn-like crackle and a few other things. If you have any tips let me know!